Showing posts with label tutorial. Show all posts

Friday, October 26, 2012

Scrappy Hangers

I don't know about you, but I tend to bungle at least one part of every project I take on. I know - big surprise.

Click on the image to see it on obstacol.

At least I've learned from these mistakes:
Always. Buy. Extra.
Of course, I don't always need all the extra I've bought, and when it comes to sewing that can leave me with a lot of leftover scrap fabric. But - another shocker, I'm sure - I have an incredibly hard time throwing away scraps.  What if something needs to be patched? Or I need to stuff a pouf? Or intergalactic war is imminent unless we can offer a patchwork quilt several acres square? What if?

Never have I claimed to be logical.

On the other hand, scraps piled up in my studio are pretty much going to waste, which is also unacceptable. Use them I must. I don't quilt (yet) so that's out. Nor do I make rag rugs (yet). I do, however, pin, and I just happened to have the perfect pinspiration for scrap-busting:

mondocherry via Pinterest. Click on image for details.

Except...I have no bangles to cover. Oh I know! I'll cover hangers!


Clare's tutorial pretty much tells the whole story, but for giggles, I'll walk you through my bangle-wrap-to-hanger-wrap process.

Begin with a big o' pile of fabric (or ribbon) scraps. I used a single fabric, but I think it'd be equally cute if you want to combine snippets from coordinating fabrics or even go wild with any and every scrap type you have on hand.


I'd recommend pressing your scrap fabric, but I doubt skipping the iron would kill the final product. After pressing (or not) cut your fabric into strips. I started with a width of 2.5 inches, but decided I liked the final look of using 1.5 inch wide strips.


Next, I combined all my strips into one really long strip. When making bias tape, binding, or anything else that requires a long, thin piece of fabric, I use the method Ashley talks about on Make It and Love It. To summarize:

Place

Sew

 Unfold

Voila

 I repeated the place, sew, unfold process until I had seven yards of 1.5-inch fabric.

Then, I introduced - cue the music - the hanger. I chose one of those thick plastic jobbies because that's what was on hand Clare's tutorial used a wide bangle so I had an idea of how the knotted fabric would loo in the end. If you use a wire hanger feel free to let me know how it turned out.


Step One: tie a know at the base of the hook leaving a tail at least 12 inches long.

12 inches of fabric to the left of the know, 6.66 yards to the right of the knot.

The 12-inch tail will allow you to tie the finishing bow.

Step Two: Actually, step two is probably best told in photos.

Take the long end behind the hanger.
Pass it through the center of the hanger and under the fabric loop.
Pull the long end until you have a knot.
Repeat all the way around the hanger making sure to keep the row of knots on the outside.
 
Step Three: When you get back to your original knot you should have enough fabric left to tie both tails into a sweet little bow around the base of the hook.


Confession: When I was done I had enough fabric leftover to wrap the hook as well.  I secured one end to the hanger with hot glue, then simply wrapped the fabric strip around the hook and secured the second end with more hot glue.


Thanks to bad lighting, I can't show you what they look like hanging in a row in Emily's closet.  You'll just have to trust me when I say they look just adorable.


Is it just me or would these make the perfect gift for just about anyone?


Yeah, I thought you'd agree.

Friday, July 13, 2012

The Great Khaki Conundrum: Solved Further

I know you are already jealous of the cute crops I told you about on Tuesday. But, brace yourself, Internet, because I am now going to share how I took those cropped khakis from cute to awesome! I'll wait while you catch your breath.

If you remember, I had more than one stain to deal with on my poor khaki pants. I solved the goo issue by shortening the legs and adding cuffs. Now what to do about the blue ink?

Briefly, I considered trimming them in lace when I saw these lovelies on YesStyle.


Inspired by the inset on the back yoke and more lace on the pockets, I thought I could find a way to "patch" over the stain and still make it look as though the lace had been part of the design all along.

But I determined the lace would make the pants altogether too sweet. Luckily, this amazing book was waiting for me at a garage sale the weekend before.


There it was, sitting in my family room just begging to be put to use.To be honest, I opened that book without having any idea what I was looking for. Internet, that book is magical. It all but fell open to a page on patch pockets!


Genius, right? A fun detail, but with clean, simple lines.

I started by cutting a template from scrap paper to get a good size. If you are a stickler for precision, you can measure out each side, but I just cut until my pocket pattern looked good. Then, I pinned it to my pants to make sure the scale and placement were good.


Next, I pinned the template to fabric from one of the legs.

Two things to note here: 1. I pinned through two layers of fabric so I could make a pocket for each leg. 2. I did not cut my fabric to the size of the paper pattern. The pattern represented the final size of my pocket so I needed to add 1/4-inch seam allowance to five of the sides. To the top, I added the 1/4-inch plus another 5/8.


Once you've cut out your pocket, fold the top edge over 1/4 inch and press.


Edge stitch the fold the fold, then fold the remaining five sides by 1/4 inch and press. Pin the heck out of those folds.


Fold the top edge down another 5/8 inch, press and stitch with a 3/8 to 1/2 inch seam allowance.

Flip your pocket over and pin the wrong side to the right side of your pant leg. Unless you chose to baste those edge folds, you'll need to take care that the raw edges have stayed tucked under and the corners are laying nicely. Now edge stitch your pocket to your pants on the five bottom sides and press.

I'm not trying to trick you with that photo. The actual stitches weren't all that visible so I drew them in. They look a bit funny, but you get the idea.
I mentioned cutting two pockets a few steps back. I thought it would make the stain-covering pocket look more like it belonged if I added a pocket on the other leg as well. So...


I love it!

I wore my cute old-made-new britches to the farmer's market last Saturday and got tons of compliments. Yea!


I just love them! Have you made anything over recently? Do you love it or wish you'd just let it be? Tell me all about it in the comments.

Tuesday, July 10, 2012

The Great Khaki Conundrum: Solved

Thank you thank you thank you, internet, for chiming in with regard to my unwearable khakis. I opted to go with cropping them even though most of you voted for the scalloped shorts. I also like the scallops and I still plan to work them into my wardrobe somewhere, but the pant legs were just too slim to go that short. Also, my mom told me I looked adorable in the cropped pants and mother always knows best.


I'm really really proud of how they turned out.  They're summery and chic, re-purposing them appeals to the tree-hugger in me, and they were virtually free.

would you like to know how to salvage an unwearable pair of your formerly favorite pants? Well, if you insist...

What you'll need:

  • Pants to alter
  • Iron and ironing board
  • Scissors
  • Straight Pins
  • Thread
  • Ruler
  • Sewing Machine

What to do:

Unlike me, I suggest you decide how short you want to go before you whack half a leg off your britches. For some of you, the issue you are trying to fix will determine the length. Once you decide on a length, measure the amount you'll cut from the bottom on both the front and the back of each leg. Why both sides? Well, on some cuts the back is slightly longer to accommodate the curve of your bum. If you cut through both layers of fabric based on the front mark your new crops might end up looking shorter in the back. Heat up that iron and press everything.


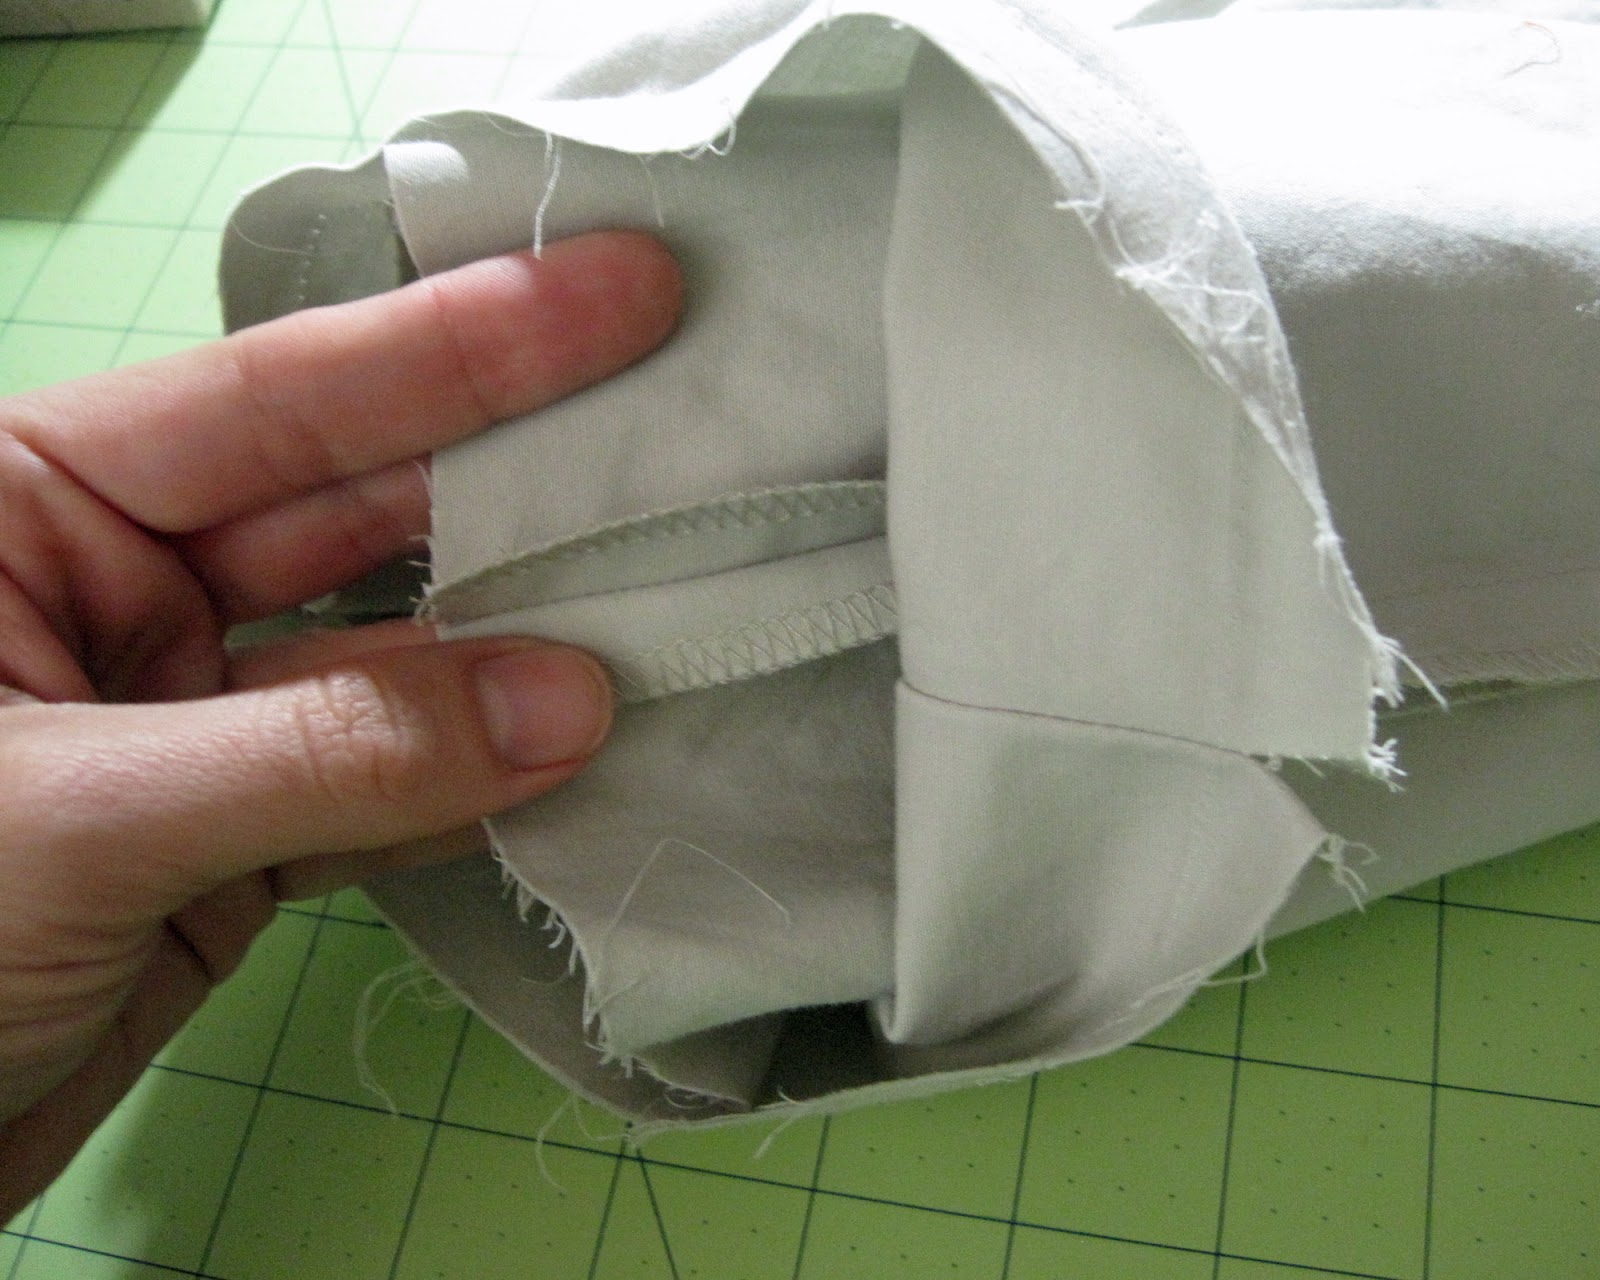
Next, I turned my (cropped) pants and the cut-off portion of each leg inside out. I slid the pants inside the pant leg so that the two cut edges lined up. In the bottom photo you can see that the wrong side of the pants will be sewn to the right side of the detached leg.


Those side seams really really need to stay lined up so I recommend pinning the heck out of that raw edge. then, using a straight stitch and 5/8" seam allowance, sew all the way around the bottom of your pant leg. Press the stitches to help set them.

Turn your pants right side out. You'll see that you've basically reattached the leg you just removed, except now it is inside out. Go ahead and press your seam allowances down.


Now we decide how large to make the cuff. I like a wide cuff which is good because, based on the location my original cut, I needed a cuff to cover that black goo stain. To be exact, I needed at least an inch and a half.


Armed with your cuff measurements, cut the inside-out pant leg twice as long as your finished cuff. To get to one-and-a-half inches I needed four inches of fabric; three to make the cuff and one to make sure my fold overlapped the seam where my leg parts were sewn together.

If you went into this project knowing how long you wanted your pants and the depth of your cuff you may have cut everything to length already. I'm sure your well-planned pants will look lovely, but the journey will be much less of an adventure compared to my trial-and-error process.

You are all very clever so I'm sure you know making cuffs will require fabric to be folded on top of itself. However, I soon realized that those side seams we lined up so carefully will quickly become bulky. To avoid issues later I recommend trimming the visible seam allowances on the lower portion of your pant leg.


Once you've cut the legs to the desired length, fold (or cuff) each leg so that the crease is at the final length for your new crops. You should now only be able to see the right side of your pant leg pieces. Press those babies.


We're almost there, Internet. Measuring from the bottom of the pant leg, find the place you'll fold to make the top part of the cuff. Measure, fold, and press your way around each pant leg.


Once you have a nice, even cuff pressed into place, pin that baby down!


I only used about an eight of an inch seam allowance from the top of the cuff when I sewed it into place.


Finally, press those babies and slip 'em on!


Ta da!

Okay, I lied. I actually did a little something more, but you'll have to wait until Friday to find out the how and what.

While you wait, though, why don't you tell me what sort of homemade nonsense are you getting into this summer?

Wednesday, November 9, 2011

Link Love: Double Sided Fabric Headband

Gosh it feels good to get stuff done! You know what doesn't feel good? Me 24 hours after doing 180 walking lunges. Okay, but that's beside the point.

It feels good to get stuff done. And it feels good to try new things. (As long as those new things are not 180 walking lunges. Just saying). I keep a running list of new projects I'd like to try on Pinterest. Those of you who followed my Craft-Along are somewhat familiar with this list.

Well, not too long ago I sort of dropped the ball when it came to getting a birthday gift for one of my daughter's friends. Luckily, I have a room full of fabric and a handy list full of tutorials to help me do things with that fabric.

Enter Jessica Fediw! She made these adorable headbands as a teacher gift!


So many readers liked them that she made a pattern and a tutorial. You know, because she's AWESOME!


Here's mine. (Alison, I'll thank you to ignore the unclipped threads.  I promise every dead thread was snipped and tidy before I gifted that puppy.)


It was so super easy I made one for Emily too. Sorry, no photo yet.

Now, I've written tutorials before and I know they can be something of a pain to write so thank you so much, Jessica, for the great tut and pretty photos.

Your turn! Have you finally tackled any items on your list of projects?