This might shock some of you, but not everyone enjoys doing projects that require a needle and thread. And sometimes a girl just wants to play with molten glue. Totally understandable.

As promised, today's tutorial involves two things - fabric and a hot glue gun. Arm yourselves, darlings, and let's get started!
There really isn't a bad choice when it comes to the fabric for this style of rose. Personally, I like something with a little heft to it - cotton jersey, wool, felt, etc. I chose some scraps from a fabric shower curtain I had previously mutilated.

I wish I could tell you for sure what it is made of, but I didn't save the tag during the afore-mentioned mutilation. It is definitely a woven (as opposed to a knit) so there will be some fraying, which I like. For a cleaner look you will want to use a non-fraying fabric or treat all of your cut edges with a fray-stopping liquid*.
Step 1:
Cut your fabric into strips. I let the length of my scrap determine the length so my strip is 30" long by 3" wide. The length (30") determines how big your final flower will be in terms of length x width. The width (3") determines the depth of your final flower.

30" x 3" with a heavy weight fabric will give a roughly 2.5" x 2.5" x .33" final flower.

After you determine the length and width of your strip, you need to taper one end. *If you are treating your edges with a no-fray product now is the time to do it.
Step 2:
Tie a knot in the tapered end of your fabric strip.

Step 3:
Hot glue the edges together as close to your knot as possible.

Step 4:
Holding the knot in one hand and the fabric tail in the other, twist twist the fabric once so that was up (facing you) is now facing away from you. Shoot it with some hot glue and roll the knot onto the glue. Press gently.

Try to use enough glue to hold your fabric in place but not so much that is squishes out the sides when you press.
Step 5:
Repeat step four (twist, glue, roll) until your fabric tail is roughly two inches long.

Step 6:
Remember how I told you in step 4 to only use enough glue to hold your fabric in place? That's because you might discover that the "back" of your flower looks better than the side you'd thought would be the front. So, turn your flower over and decide which side you like better.

I like the "front" better so I will add a big glop of hot glue to the back of my flower just to one side of the center.

Now twist the tail a final time and press it into the glue.
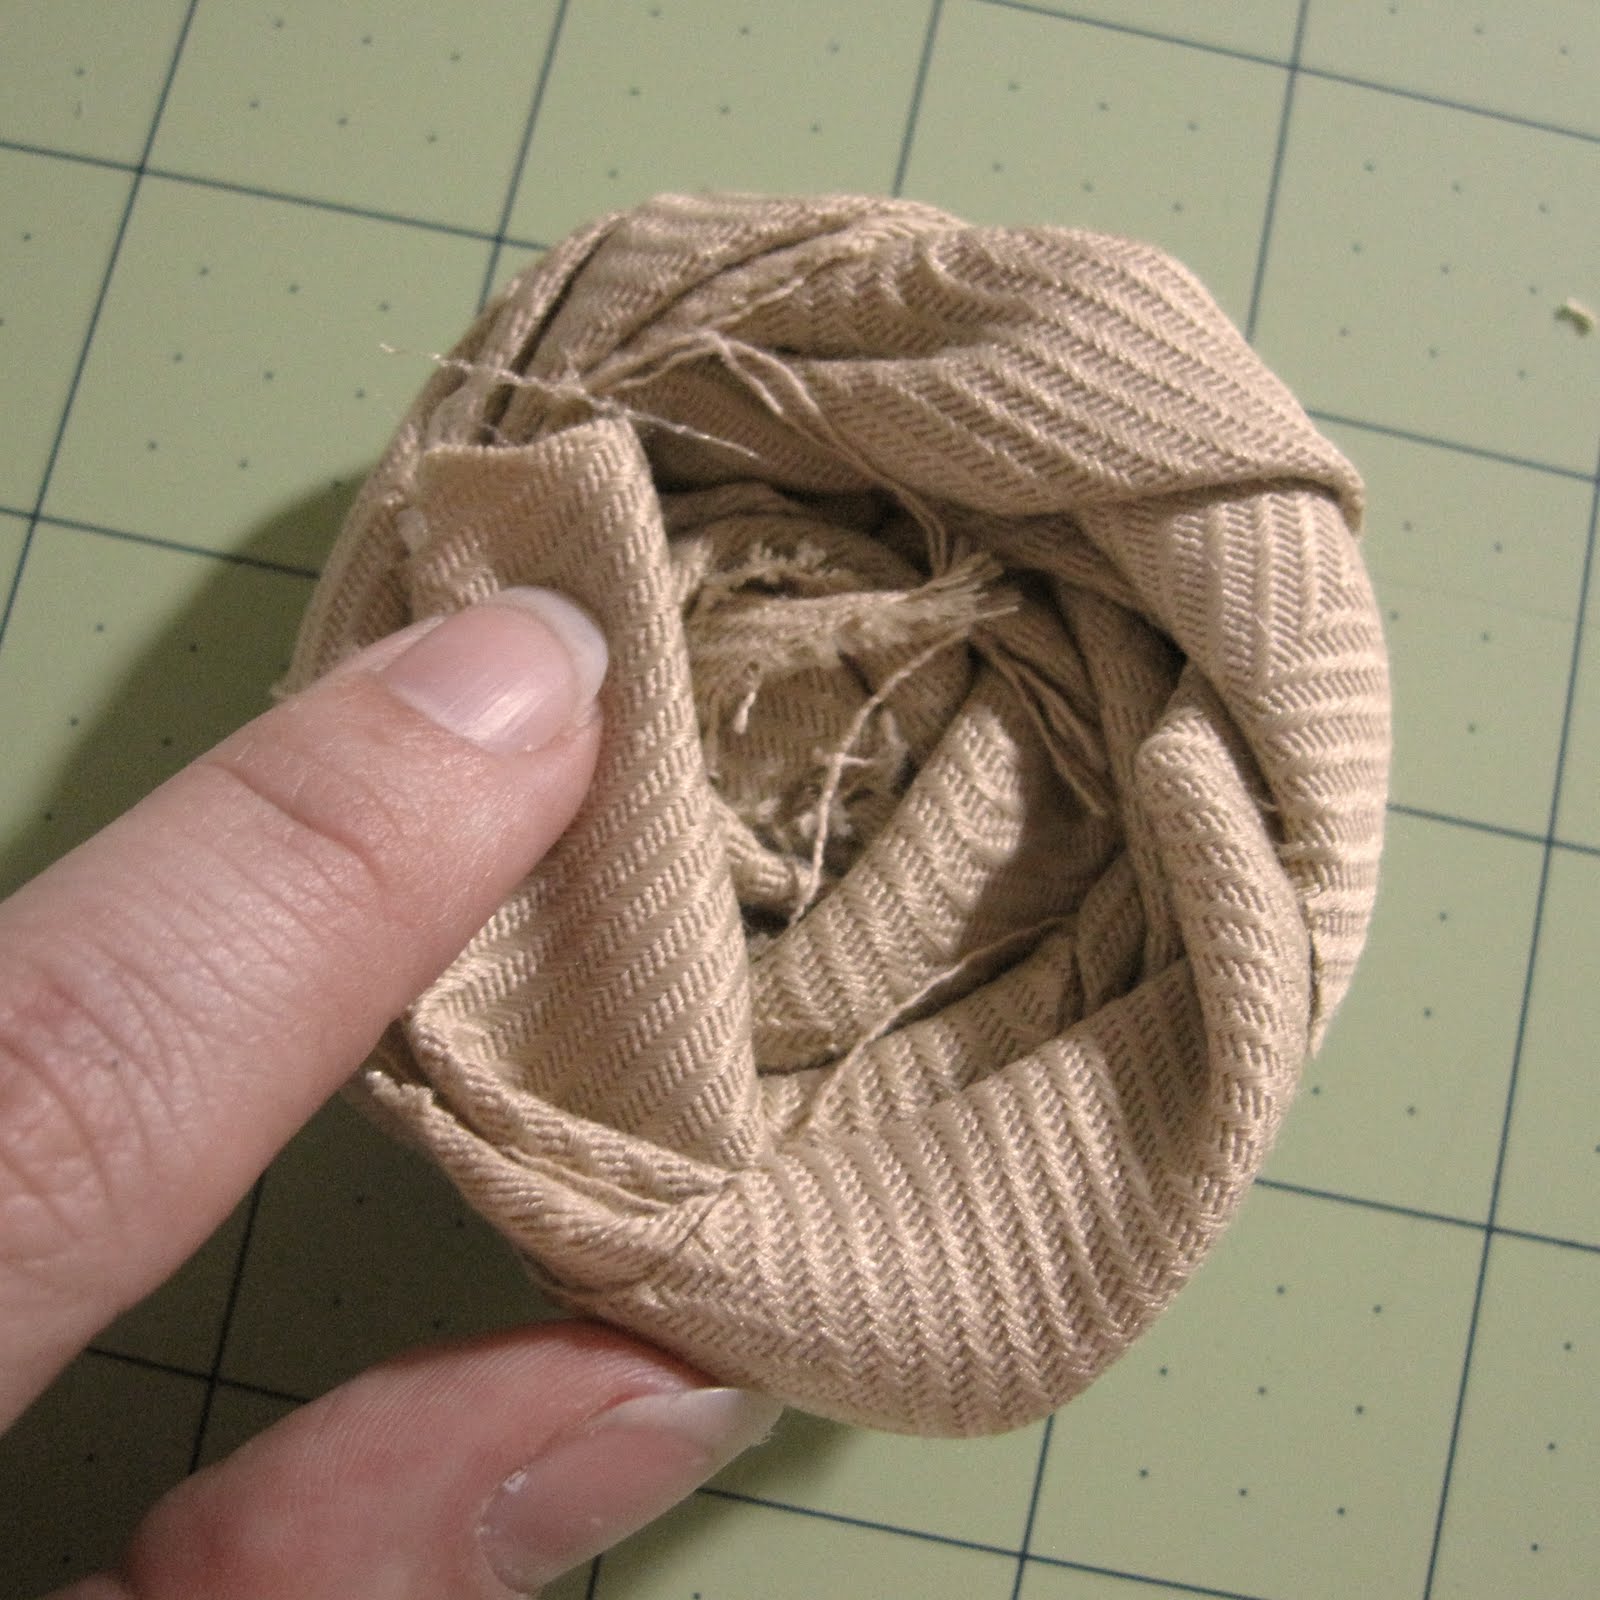
Feel free to shoot a little glue into any crevices you feel could use a little extra hold. Just be careful that you don't use so much glue it oozes out the front side of your flower.
Step 7:
I bet you thought you were done. And you are, for the most part. Before I called it "good" I trimmed a few extra strings and fringe. I like that raw, shabby chic look, but there is a point when it looks more shabby than chic. So a little snip here and a slight snip there and...

Two down, two more to go! How are you guys doing on your wreaths?
Looking for the rest of the craft along? All the posts are here.
1 comment:
Thanks for this simple and awesome tutorial! Although I forgot that felt plus molten glue equals squishy hot fun with some extra safety of not burning your fingers. Thanks again!
Post a Comment