I think today's flower looks like a marigold.
 |
| via |
Except that it's navy.
And if I can make a navy marigold, you can make an any-color-you-want marigold. Ready?
Supplies:
Fabric
Needle
Thread
Scissors
Hot glue or Fabric glue
Lighter or Fray-stopping liquid*
Button*
*As usual, the starred items are optional.
Before we start, I want to talk about the fabric for this flower. I chose a cotton velvet for a number of reasons. It's a heavier fabric so it feels very "fall" to me. It also has some stiffness so my flower isn't floppy or droopy. Other good fabrics include taffeta, felt, tweed, netting, and burlap.
Step 1:
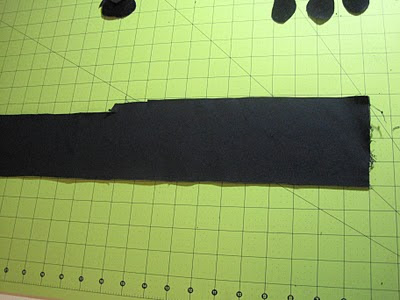
Start with a strip of fabric 25 inches by 4 inches. Cut that into several 4" by 1.5" strips.
Step 2:
Cut 12 of your strips into a shape similar to those wooden ice cream spoons. Four of your petal strips should be close to the original 4" x 1.5" size. Cut your remaining eight shapes so that each is smaller than the last, making your final piece roughly 2.25" x .5".
You also need to cut two circles* one with a 1.5" diameter and one with a .75" diameter.
If you are using a satin this is where you want to heat-seal your edges to prevent fraying. For other woven fabrics, apply a fray-stopping liquid and allow it to dry before you continue. Velvet frays (and is actually really messy) but I like the fuzzy-edged look so I opted to leave my edges raw.
* The smaller circle will eventually be your flower center so feel free to use a button, broach, or round earring instead of fabric.
Step 3:
Start with your large circle and one of the four 4" x 1.5" petal shapes. Center the petal on top of the circle and sew it in place with one or two stitches. Your stitches should be close to the circle's edge.
 | |
| The arrow points to where your stitches should be. |
I don't recommend gluing your petals in place on this particular flower. As you add petals you'll note that the center gets really thick. Glue would just add to the bulk.
Step 4:
Add the remaining three "large" petals so that each fabric strip overlaps the one before it by a few centimeters. It'll form a sort of pinwheel effect.
Sew each petal in place with one or two stitches along the edge of the circle. Continuing adding petals in decreasing-size order, ending with the smallest petal shape on top. As you add petals spiral your securing stitches toward the center of the bottom circle.
Step 5:
Now all you have to do is fire up your glue gun and add your center circle (or embellishment of your choice).
Here's what my flower would look like with a jaunty wooden button center.
And that's it! Another flower style for your wreath!
How is your project coming along? Any special requests for tomorrow's tutorial?


No comments:
Post a Comment